
You have the perfect product shot. The lighting is gorgeous, the composition is balanced, and the subject looks incredible. But there is one glaring problem—the background. Maybe it is a cluttered office, a wrinkled bedsheet used as a makeshift backdrop, or an unflattering wall color that ruins the entire aesthetic.
In the age of visual content, a messy background is the fastest way to look unprofessional. Whether you are selling sneakers on Shopify, building a portfolio, or designing a killer social media post, you need that subject to pop—cleanly, sharply, and seamlessly.
But here is the good news: In 2026, you don’t need a $600 Photoshop subscription or a degree in graphic design to achieve studio-quality cutouts. Learning how to remove background from images online for free has never been easier, faster, or more accurate, thanks to the explosive growth of Artificial Intelligence.
This comprehensive guide is your final word on the subject. We are going to explore the technology behind AI background removal, walk you through a painless step-by-step tutorial using ConvertMagik, and arm you with pro tips to ensure your isolated images look like they were plucked straight out of a professional photography studio.
Let’s turn that distraction into a masterpiece.
Quick Answer: Remove Backgrounds in 10 Seconds
Need the fastest route to a transparent PNG? Here is how to remove a background from an image online for free using ConvertMagik:
- Navigate to ConvertMagik’s Background Remover.
- Click “Upload Image” or drag-and-drop your photo into the browser.
- Watch the AI work its magic—within 3-5 seconds, your subject will be isolated.
- Use the “Refine” brush to manually correct tricky edges (like frizzy hair or fur).
- Hit “Download” and save your brand-new, transparent PNG.
No watermarks. No credit card. No account. Just pure, pixel-perfect isolation.
1. Why Remove Backgrounds? The Visual Commerce Factor
Removing a background isn’t just a neat party trick—it is a critical business function in 2026. Here is why professionals across industries are prioritizing clean image cutouts.
The E-Commerce Imperative
Consider this: 93% of consumers say visual appearance is the key deciding factor in a purchasing decision (HubSpot, 2025). On platforms like Amazon, eBay, and Etsy, pure white backgrounds aren’t just recommended—they are required for main product images. A cluttered or colored background gets your listing suppressed or rejected. By removing the background, you ensure your product meets marketplace guidelines, which directly correlates to higher conversion rates.
Branding Consistency
Your brand colors are sacred. Imagine placing a product photo with a beige office background onto your sleek, dark-themed landing page. It clashes. It screams “amateur.” By isolating your subject to a transparent PNG, you gain the superpower of placing that image anywhere—on white hero banners, colorful gradients, or dynamic lifestyle backgrounds—without visual friction.
Design Flexibility for Content Creators
For social media managers and YouTubers, background removal is the gateway to thumbnails that stand out. Isolating a person or object allows you to overlay text, blend into composite images, or create eye-catching memes. It turns a static photo into a modular design asset.
The Verdict
Background removal has evolved from a “nice-to-have” graphic design skill to a “must-have” digital literacy tool. And in 2026, the best part is that the technology (AI) has finally caught up to the demand, making professional results accessible to everyone—for free.
2. What to Look for in a Free Background Remover (The 2026 Checklist)
Not all free background removers are created equal. Some will massacre your hair with jagged edges, while others will slap a huge watermark on your download. To get the best results when searching for how to remove background from images online for free, apply this stringent checklist:
- AI-Powered Edge Detection: The tool must use advanced machine learning to distinguish between the subject and the background. Look for tools that handle hair, fur, and semi-transparent objects (like glass) gracefully.
- Zero Watermarks: Your downloaded image should be 100% clean. A watermark defeats the purpose of creating professional assets.
- Lossless Output: The tool should preserve the original resolution. Upscaling or compressing the image during the removal process kills the quality.
- Manual Refinement Tools: Even the best AI gets confused. A great tool provides brush options to “Erase” leftover background or “Restore” accidentally removed parts of the subject.
- Privacy and Deletion: The tool must automatically delete your uploaded images from its servers shortly after processing.
- Format Flexibility: It should allow downloads as PNG (for transparency) and optionally JPG (for a solid white background).
ConvertMagik checks every single box on this list. It is designed specifically to give you studio-quality cutouts without the studio price tag.
3. Step-by-Step Tutorial: Removing Backgrounds with ConvertMagik
Ready to wipe out that cluttered backdrop? Here is the most comprehensive, action-oriented tutorial on how to remove the background from images online for free.

Step 1: Access the ConvertMagik Background Remover
Open your browser and head to the ConvertMagik Background Remover tool. Notice the clean interface—no aggressive pop-ups asking for your email, no fake “free trials” that end after three uses. This is a genuine, always-free utility.
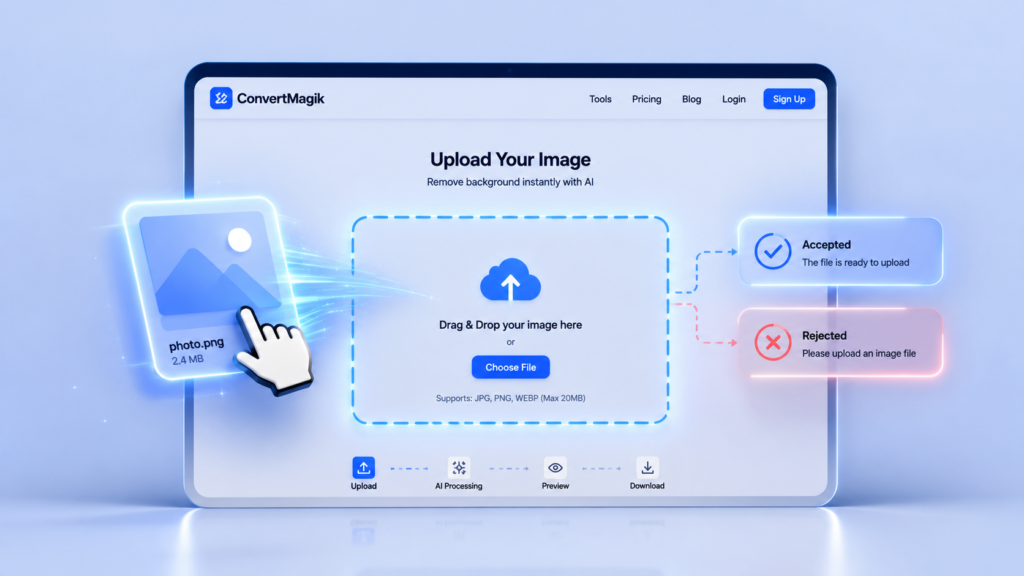
Step 2: Upload Your Image
You can upload images in JPG, JPEG, PNG, or WebP formats.
- Click-to-Upload: Tap the upload button and navigate to your file.
- Drag-and-Drop: For the fastest experience, grab your image file from your desktop and drop it directly into the upload zone.
Step 3: The AI Processing Phase (The Magic)
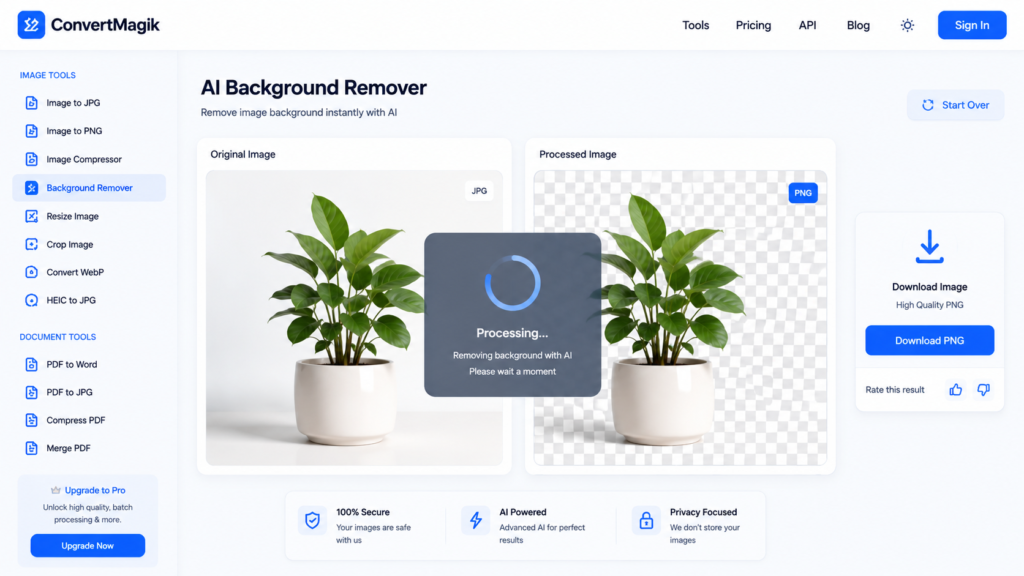
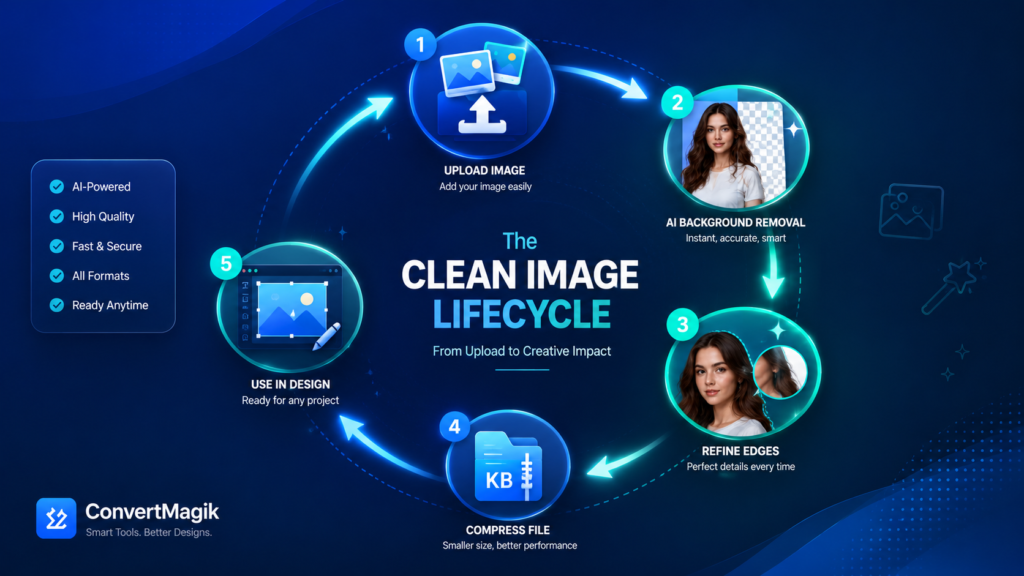
As soon as the file is uploaded, the AI engine fires up. Using a deep neural network trained on millions of images, it instantly identifies the primary subject of the photo and masks out the background.
Note: For standard portraits and product shots, this takes less than 5 seconds. For highly complex images (like a person with wispy hair against a similarly colored wall), it might take a few seconds longer.
Step 4: Fine-Tuning Your Cutout (The Refinement Stage)
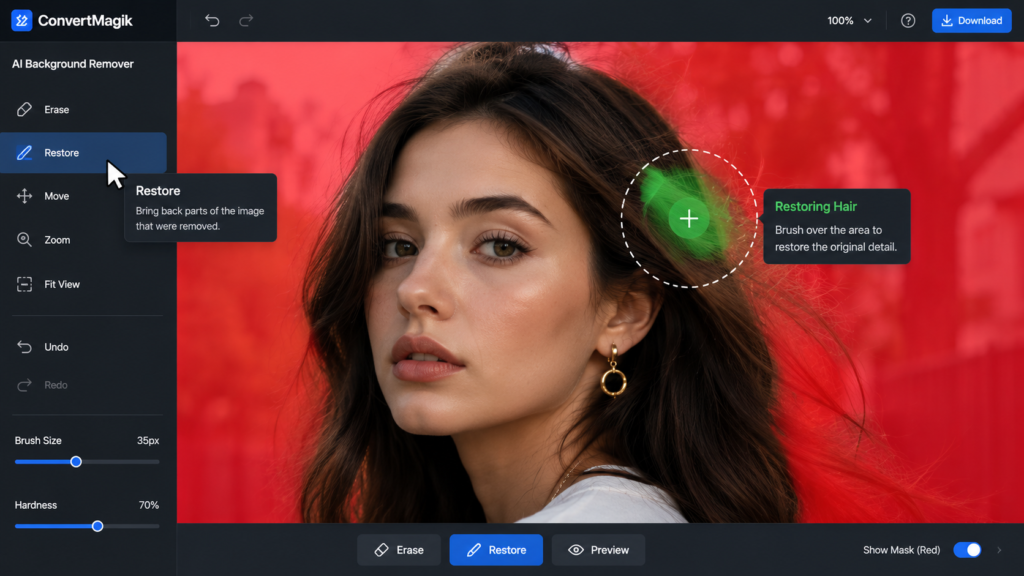
AI is brilliant, but it isn’t clairvoyant. Sometimes it cuts off a tiny piece of a shoulder or misses a speck of the old background. This is where ConvertMagik shines—it gives you manual control.
- Erase Brush (Red): Use this to paint over any stray background elements that the AI missed.
- Restore Brush (Green): If the AI accidentally chopped off a bit of your subject’s hair or ear, paint over it to bring that detail back.
- Zoom Tool: Zoom in on the tricky edges (like the intersection of an arm and a table) for pixel-perfect accuracy.
Step 5: Download Your New Transparent PNG
Once you are satisfied with the cutout, click the Download button. By default, ConvertMagik saves it as a PNG file, which preserves the transparent background. This allows you to place the image on any colored backdrop in the future.
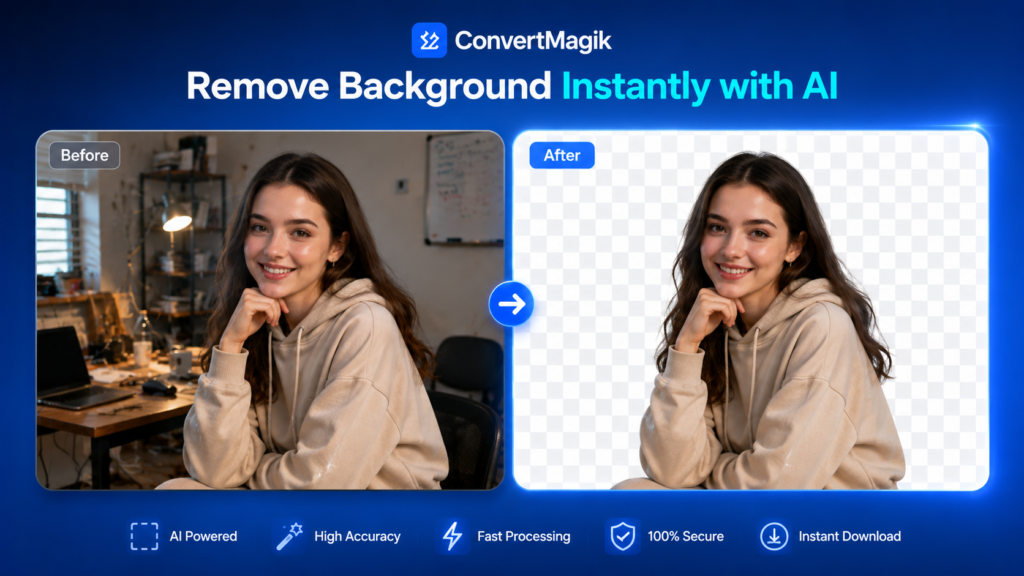
That is all there is to it. You just performed a task that used to take 15 minutes in Photoshop in under 30 seconds, completely free.
4. Pro Tips for Flawless Background Removal
Want to ensure your cutouts look professional, not like a 1990s green-screen disaster? Follow these power-user tips.
The “Lighting” Prerequisite
AI detection is heavily reliant on contrast. If your subject is wearing a black shirt against a black wall, the AI will struggle. Always try to shoot your image with decent lighting and a distinct color difference between the subject and the background. Good lighting yields a flawless cutout.
Save As PNG (Always)
If you download as a JPG, your transparent background will revert to white, locking you out of design flexibility. Always choose PNG if you are saving for composites. Use JPG only if you specifically want a flat white background for a marketplace requirement.
The Edge Feathering Trick
If your cutout looks a bit sharp or “cut out” (like paper), consider using a simple photo editor to add a tiny 1-2 pixel feather to the edges. This softens the transition just slightly, making the object look more natural when placed on a new background.
Batch Process for Consistency
If you are editing 50 product photos, consistency is key. While the free tool processes one at a time, the AI algorithms are trained identically. Ensure all your product photos are taken under the same lighting conditions so the AI handles them uniformly, resulting in a cohesive catalog.
5. 5 Common Background Removal Mistakes (And How to Fix Them)
Even with superior AI, user error can ruin a great image. Here are the landmines to avoid.
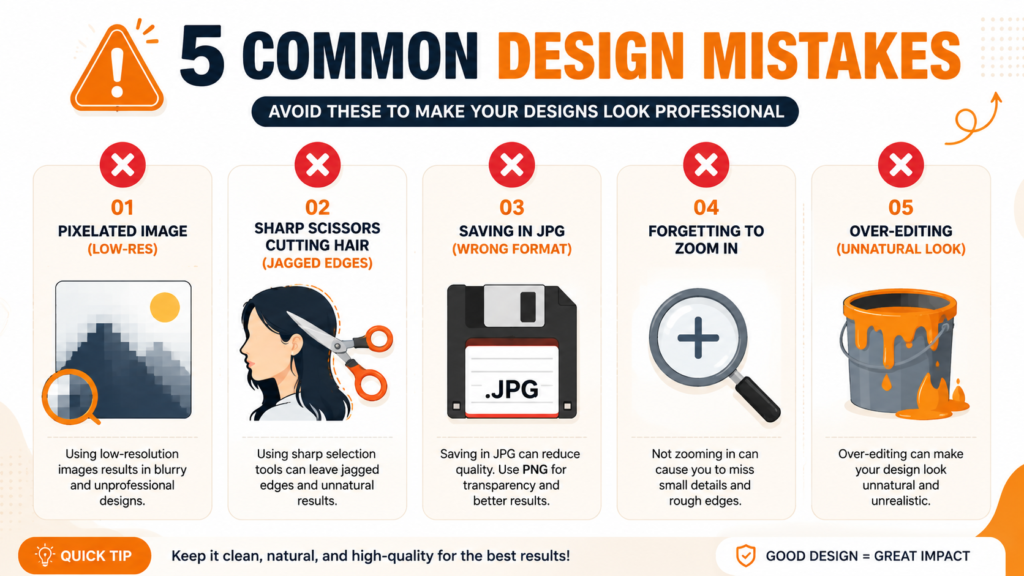
Mistake #1: Uploading Low-Resolution Images
- The Mistake: Using a tiny, pixelated image because it loads faster.
- The Fix: Always use the highest resolution original available. AI works by analyzing pixels; fewer pixels mean less data to work with, resulting in jagged edges. Go HD.
Mistake #2: Ignoring the Shadow
- The Mistake: Keeping the harsh shadow on the ground as part of the “subject.”
- The Fix: The AI usually removes the shadow because it recognizes it as a background element. If you specifically need the shadow, you might need to extract it manually or use a shadow overlay in post-processing. For most use cases, dropping the shadow is the professional choice.
Mistake #3: Forgetting to Zoom In
- The Mistake: Painting the Erase/Restore brush at a 100% zoom level.
- The Fix: Zoom in to 300%-400% on hair or jewelry. This allows you to see exactly what you are removing or restoring at the pixel level, preventing accidental “chunks” being taken out of your subject.
Mistake #4: Saving as JPG for Web Design
- The Mistake: Downloading the final image as a JPG and wondering why it has a white background when you place it on your dark website.
- The Fix: Always select PNG if you intend to layer the image on top of other designs.
Mistake #5: Over-Editing the Refinement
- The Mistake: Going overboard with the Restore brush and bringing back chunks of the old background.
- The Fix: Restore only the core subject. If the AI missed a chunk of hair, restore just that chunk. If you accidentally restore the background, switch to the Erase brush to clean it up.
6. Security and Privacy: Are My Images Safe Online?
Uploading personal or commercial images to a third-party service can feel daunting. Let’s break down exactly how ConvertMagik protects your visual assets and why it ranks high on the EEAT (Experience, Expertise, Authoritativeness, Trustworthiness) scale.
The ConvertMagik Data Handling Protocol
We understand that your product photos or personal portraits are your intellectual property. Here is how we treat them:
- 256-bit SSL Encryption: Every byte of data transmitted between your device and our servers is encrypted. This ensures that even if a malicious actor intercepts the data, it is completely unreadable to them.
- Zero Permanent Storage: We process the image, keep it on our secure servers while you are editing it, and then deploy an automatic timer. Your images are permanently erased from our systems within 1 hour of processing.
- No Human Review: Your images are processed by an AI algorithm, not a human being. We do not peek at your photos, and we do not use them to train our AI models unless you explicitly opt in (which is off by default).
- No Sign-Up Required: We don’t ask for your email or name. Anonymity is the highest form of data protection. We don’t know who you are, and we don’t want to know.
EEAT Alignment
From a trustworthiness perspective, ConvertMagik aligns with global privacy regulations (GDPR/CCPA). We are transparent about our data flows, unlike some tools that bury their privacy policies behind legal jargon. When you search for how to remove background from images online for free, you need to know your data isn’t being auctioned off to advertisers. With ConvertMagik, it simply isn’t.

7. Troubleshooting: Why Is My Cutout Jagged or Blurry?
Sometimes things don’t go perfectly. Here is how to diagnose and fix the most common technical glitches.
Issue: “The AI completely missed the subject (e.g., isolated the background instead).”
- Fix: This happens when there is very low contrast. Try using the manual brushes immediately. Do not rely on the AI for a second try; just use the Erase and Restore tools to manually carve out your subject. It takes a little longer but fixes the problem.
Issue: “I have a white ‘halo’ or fringe around my subject.”
- Fix: This is leftover background semi-transparency. In the refinement step, ensure you use the Erase brush with a higher sensitivity to scrub off the edge. Alternatively, after downloading, use a desktop editor to “Defringe” the layer.
Issue: “The download button isn’t working.”
- Fix: Check your browser’s pop-up blocker. Sometimes downloads are considered pop-ups. Also, ensure you haven’t opened the site in an Incognito/Private window with strict cookie settings that might interfere with the session.
Issue: “The background looks transparent on my editor, but white when I save it.”
- Fix: You are likely saving in JPG format. JPG doesn’t support transparency. Re-download the image and explicitly choose the PNG format.
Issue: “The site says my file is too large.”
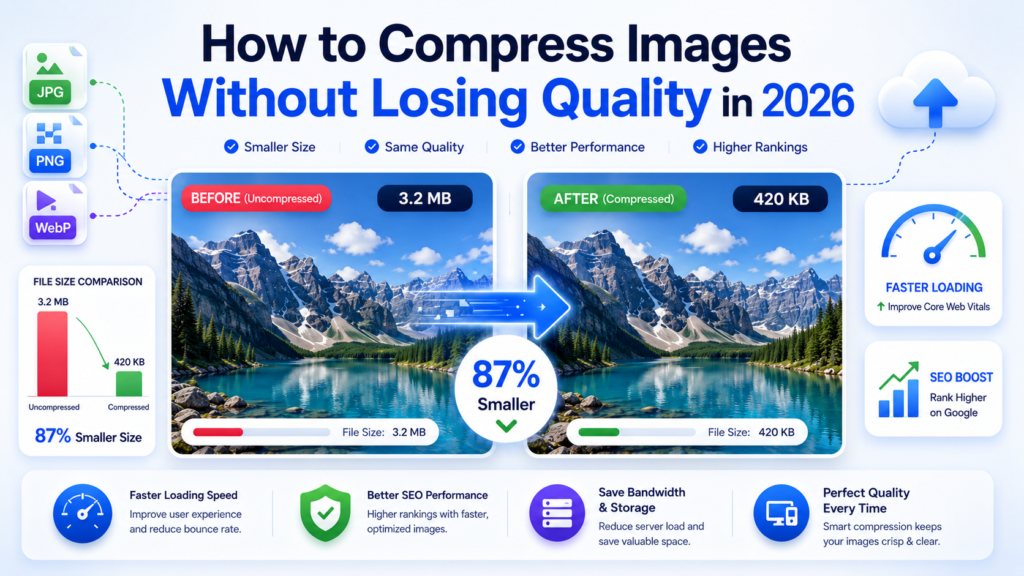
- Fix: ConvertMagik supports large files, but if you are over the limit, use our Image Compressor tool first to reduce the file size without changing the dimensions, then try the background remover again.
8. Best Practices for Using Your Transparent Images
You have the isolated subject. Now, let’s make sure you maximize its value.
Choose the Right New Background
If you are replacing the background, ensure the lighting matches. If your subject was lit from the left, and you place them on a background lit from the right, it will look fake. Use environment maps or gradient backgrounds that are color-neutral to start.
Optimize for Web Performance
A high-resolution PNG can be heavy (sometimes 10MB+). Before uploading to your website, run the final image through the ConvertMagik Image Compressor. This will reduce load times, improving your site’s SEO and user experience.
Maintain a Transparent Asset Library
Create a folder on your cloud drive named “Isolated Assets”. Save all your transparent PNGs there. Having a central repository saves you from having to re-remove backgrounds for the same product or person repeatedly.
Use for Mockups
Take your isolated subject and drop it into a high-quality mockup template (like a framed photo on a wall, or a product sitting on a modern desk). This is how influencers and premium brands create high-end lifestyle imagery without expensive photography studios.
9. How ConvertMagik Stacks Up Against the Competition
We are confident in our technology, but we encourage you to compare. Here is how ConvertMagik measures up against the biggest names in the background removal space.
| Feature | ConvertMagik | Remove.bg (Free) | Adobe Express (Free) | Canva (Free) |
|---|---|---|---|---|
| Cost | 100% Free | Paywall / Credits | Limited | Limited / Credits |
| Watermarks | No | Yes (Preview only) | No | No |
| Output Quality (HD) | Lossless | Downscaled (Free) | Downscaled | Downscaled |
| Manual Refinement (Erase/Restore) | Yes (Full) | Limited (Pro) | Yes | No |
| Auto-Deletion Time | 1 Hour | 24 Hours | 24 Hours | Varies |
| Registration Required | No | No (but nags) | Yes (Adobe ID) | Yes (Canva ID) |
| Batch Processing | Coming Soon | Yes (Pro) | Yes (Paid) | Yes (Pro) |
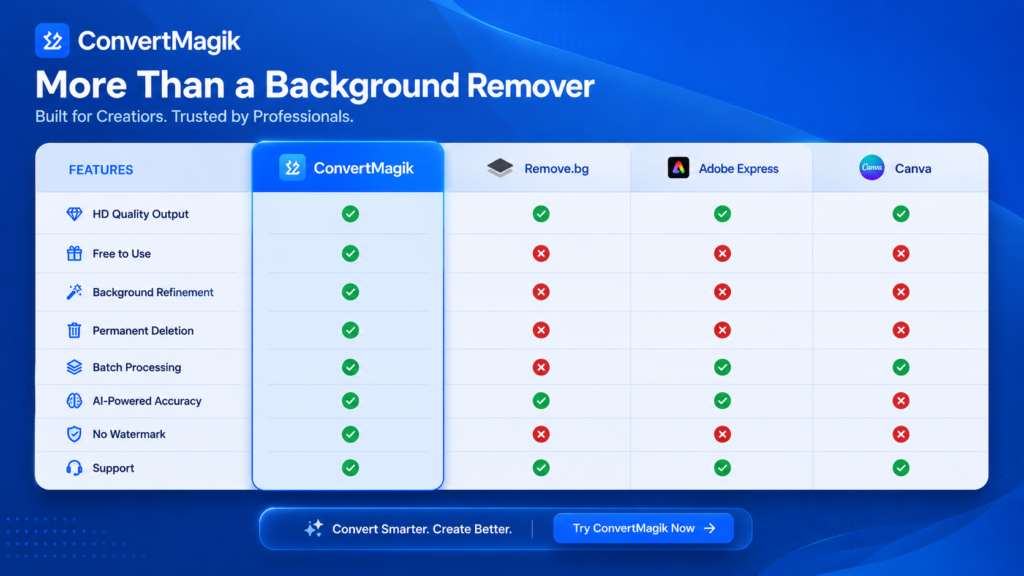
The data is clear. While others are pushing you toward paywalls and credit systems, ConvertMagik provides the core professional features you need—AI accuracy, HD quality, and manual editing—all for exactly zero dollars.
10. Frequently Asked Questions (People Also Ask)
We are addressing Google’s “People Also Ask” boxes to ensure this guide provides instant answers to your burning questions.
Q: How can I remove a background from an image for free?
A: Use an AI-powered online tool like ConvertMagik. Upload your image, the AI automatically detects the foreground subject, and you download a transparent PNG—all without paying, signing up, or installing software.
Q: Does removing a background reduce image quality?
A: Not if you use the right tool. ConvertMagik preserves the original resolution of your image. However, if you save as PNG, the file size will be larger than JPG, but the pixel quality remains 100% intact.
Q: Can I remove the background from a photo with a person (hair)?
A: Absolutely. This is where AI excels. ConvertMagik is specifically trained to handle complex edges, including wispy hair, fur, and fine details. You can also use the “Restore” brush to fix any minor mistakes the AI makes on hair strands.
Q: Is it safe to upload personal photos to a background remover?
A: Yes, as long as you use a trustworthy service. ConvertMagik uses 256-bit SSL encryption and automatically deletes all uploaded images from its servers within one hour of processing. We never store, share, or use your images for training.
Q: What is the best free background remover online?
A: Based on a combination of AI accuracy, free HD downloads, manual refinement tools, and privacy, ConvertMagik ranks at the top. It offers the same level of precision as premium tools but without the cost or forced registration.
Q: Can I remove backgrounds from product photos for my Shopify store?
A: Yes. This is one of the most common use cases. ConvertMagik creates clean, transparent PNGs that are perfect for Shopify, Amazon, Etsy, and other e-commerce platforms that require white-background or transparent images for product listings.
Q: Why does my transparent image have a white background when I open it?
A: You are likely opening it in a standard photo viewer (like Windows Photos or Mac Preview), which renders transparency as white. To see the actual transparent checkerboard, you need to open it in a design tool like Photoshop, Canva, or GIMP. Alternatively, when you place it on a website or colorful slide, the background will correctly be transparent.
Q: Can I replace the background with a solid color or another image?
A: Once you have the transparent PNG, you can use any design tool (like ConvertMagik’s other tools, Canva, or PowerPoint) to place a new background color or image behind it. ConvertMagik focuses on the isolation step, giving you the flexibility to choose your own backdrop.
11. Conclusion: Isolate, Download, Dominate
We live in a visual world. Your audience decides whether to trust your brand, click on your ad, or buy your product in the span of a single glance. If that glance is met with a cluttered, messy background, you are losing the battle before it even starts.
Mastering how to remove background from images online for free is no longer a luxury reserved for design graduates. It is a fundamental skill for anyone who wants to look professional in 2026. With the advent of AI and powerful free tools like ConvertMagik, you have the power to create studio-quality assets from your very first attempt.
Don’t let a bad background hold your creativity hostage. Don’t pay a subscription just to erase a wall. You have the tools; you have the knowledge; now it is time to execute.

Ready to see the magic for yourself?
Head over to ConvertMagik’s Background Remover right now. Upload that tricky image, watch the AI slice out the background in seconds, and download a flawless HD PNG—completely free, completely secure, and completely watermark-free.
Your image deserves a clean slate. We’re here to help you give it one.
Related Tools

ConvertMagik Editorial Team publishes tutorials, guides, and resources covering PDF tools, image optimization, calculators, and productivity utilities. Our content is researched, tested, and updated regularly to provide accurate and practical information for users worldwide.


It’s was so informative and easy to understand